
Start in WordPress → Settings → Reading: make sure your live site allows search engine indexing. Then focus on the pages where visitors book, buy, or ask for help. AI search optimization builds on SEO by making those pages easier to access, understand, and cite.
Here’s your plan:
- Check page access: Find crawl blocks, indexing issues, and missing content.
- Answer the question first: Explain what you offer, who you serve, and how to take action.
- Use specific headings: Make each section’s purpose clear.
- Add matching JSON-LD: Keep structured data aligned with your visible content.
- Verify business details: Check prices, hours, service areas, and customer answers.
- Test IndexNow: Notify supported search engines when public pages change.
- Measure results: Track citations, referrals, and conversions separately.
LovedByAI helps businesses assess their visibility in AI search. These steps give you a clear starting point, but they do not guarantee citations or traffic.
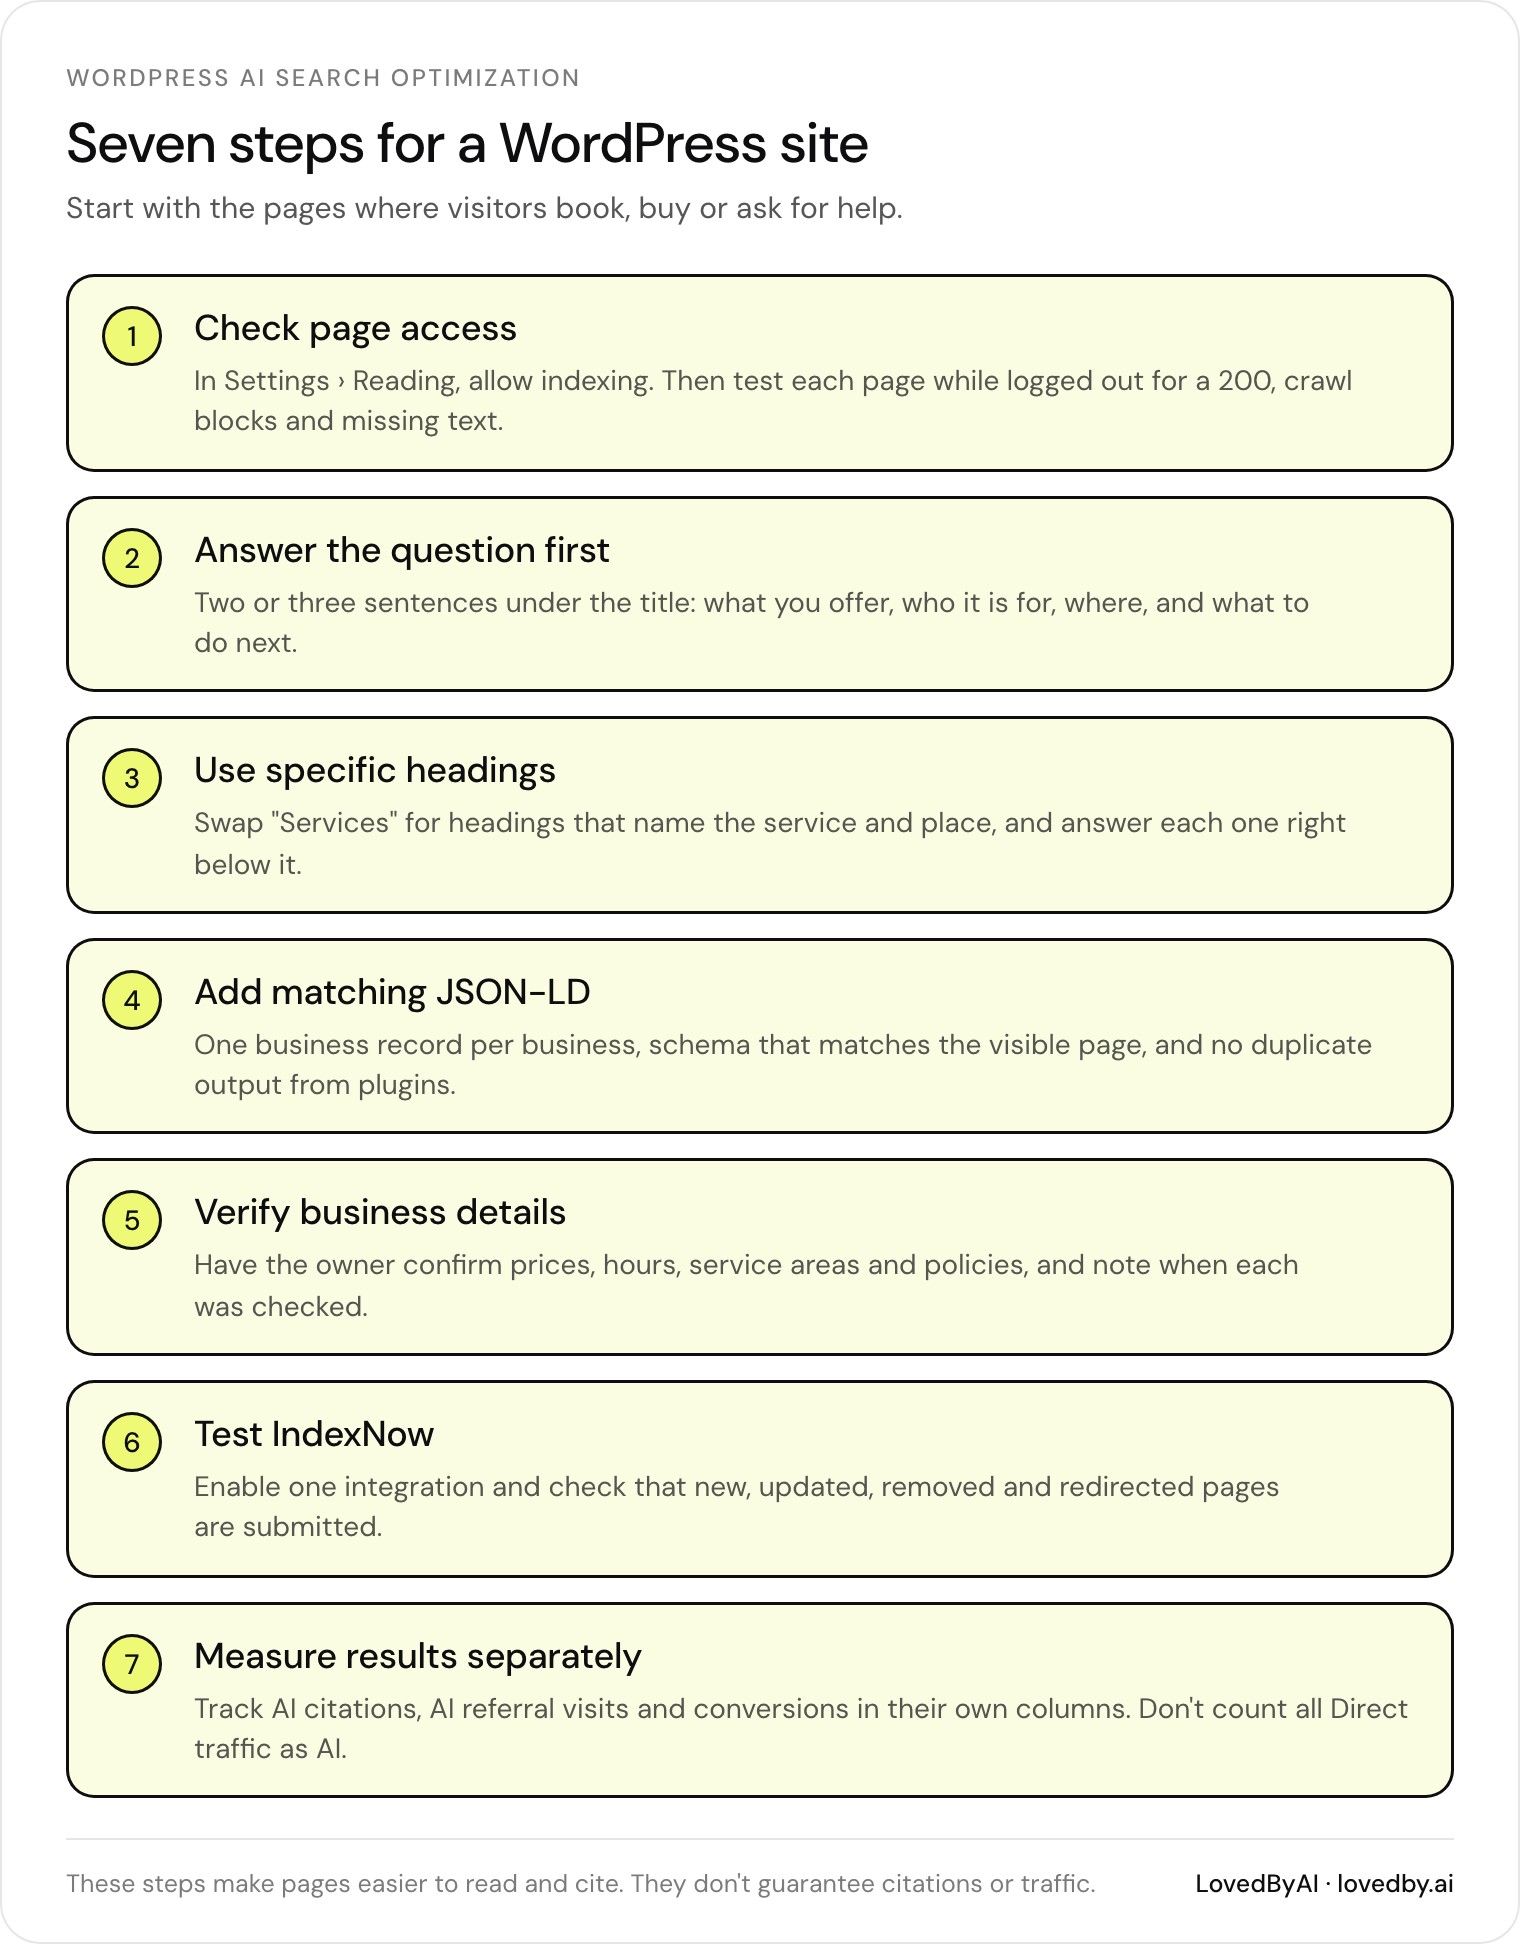
Seven steps for a WordPress site
Check Site Access and Improve Page Content
Step 1: Audit Crawlability and AI Readiness
In WordPress → Settings → Reading, uncheck “Discourage search engines from indexing this site” on your production site.[6] Test your priority URLs while logged out. Look for HTTP 200 responses, login restrictions, firewall or CDN blocks, and missing main text in the rendered HTML.
Check robots.txt and page-level robots tags, too. robots.txt controls crawling; noindex controls indexing. A blocked crawler may never reach the noindex tag.[8]
Use Google Search Console’s URL Inspection to check indexing and the selected canonical URL. Review each page’s title, H1, business or author details, and relevant internal links. Record current clicks, impressions, conversions, and AI search referrals in your audit sheet.
Follow check → fix → retest → record, and verify the live page after each change.[5] Once the crawlability checks pass, rewrite the opening text so it answers the query right away.
Step 2: Add Answer-First Introductions
Place a Paragraph block directly below the page title with a direct answer that AI systems can extract. In two or three sentences, explain what the page offers, who it serves, where it applies, availability, and what the reader should do next.
Before publishing, replace the bracketed name. Check the phone number, service boundaries, schedule, and booking process against your business records. Then support the answer with headings that match the page’s main purpose.
Before: “Welcome to our website. We offer many plumbing solutions for customers throughout the area.” After: “Denver homeowners can book 24/7 emergency plumbing service from [Business Name] by calling (303) 555-0148 or submitting the online request form. Technicians serve Denver and nearby communities, subject to current availability.”
Step 3: Use Clear, Specific Headings
Replace generic headings such as “Services” with specific phrases like “Emergency Water-Heater Repair in Denver.” In WordPress Heading blocks, use H2 for scope, process, pricing factors, availability, and limitations. Use H3 only for subsections. Adjust font size in block styles without changing the heading level.
Answer each heading right below it. Under a pricing heading, explain diagnosis, parts, labor, and after-hours charges instead of burying those details later.
Keep your business name, service, and location consistent across the title, introduction, headings, and contact details. Specific headings paired with direct answers help AI systems find the relevant passage quickly.[7]
Optimize your WordPress site for AI search
Find out what ChatGPT, Gemini, and Perplexity can and can't read on your site, and exactly what to fix.
Add Structured Data and Verified Details
Step 4: Add JSON-LD That Matches Each Page
Once your visible copy is clear, add schema that describes the same business and page purpose in a machine-readable format.
Check existing markup before adding more. Use one business record per business and reuse its @id across pages. Check the rendered page source for application/ld+json scripts added by your WordPress theme, SEO plugin, local SEO plugins, WooCommerce extension, or manually inserted code. Disable any overlapping output.[9][10]
Choose schema based on the page’s main visible purpose. You don’t need every available type.[9][10][12]
| Visible page content | Schema type | Details to include |
|---|---|---|
| Company overview | Organization | Official name, URL, logo, and verified contact details |
| Physical business or branch | LocalBusiness | Verified location, telephone, customer-facing hours, and service area |
| Individual plumbing service | Service | Specific service, page URL, service area, and link to the business record |
| Individual product | Product | Name, identifiers, and current price and availability where applicable |
| Editorial post | Article | Headline, author, publisher, and publication and modification dates |
| Genuine step-by-step instructions | HowTo | Visible steps, tools, and materials that match the page |
| Visible hierarchical navigation | BreadcrumbList | Breadcrumb names and linked URLs matching the page |
Use the Schema.org Validator, then Google’s Rich Results Test to check supported rich results. In Google Search Console, use URL Inspection to confirm Google can access the intended content and markup. Valid schema does not guarantee AI citations or enhanced results.[9][10][11] Validate your markup, clear the cache, and retest the live page.
Step 5: Publish Verified Service Details
Add the same verified details to your page copy so users and search systems get one consistent answer.
Review support conversations, forms, calls, and Search Console queries to find common booking and buying friction points. Look for service-area and scheduling details, pricing factors, and product compatibility information that help visitors take the page’s main action.
Place each verified detail next to the booking form, estimate request, or product section. Include conditions, exclusions, and what to do next. Use WordPress Paragraph or Heading blocks.
Before publishing, have the relevant business owner verify each detail. Record its source, target URL, reviewer, review date, and next review date. Keep these answers visible on the page, and update them whenever coverage, prices, hours, or policies change. Consistent details backed by sources help AI systems assess your page’s reliability.
Set Up IndexNow and Measure AI Search Results
Step 6: Enable and Test IndexNow
Once your answer-first copy, headings, schema, and verified details are live, use IndexNow to notify supported search engines faster. Enable one integration, such as the official Microsoft IndexNow WordPress plugin, and check which post types and updates it submits. Confirm that HTTPS works consistently, XML sitemaps work, canonical URLs are correct, and public pages have no accidental noindex directives. IndexNow does not guarantee crawling, indexing, ranking, or inclusion in AI-generated answers.[13][15][16]
Let the integration generate and verify the key. It must be 8–128 characters long, using only letters, numbers, and hyphens. Open the public UTF-8 {key}.txt file. Check that it returns HTTP 200, contains the exact key, and has no authentication, redirects, firewall restrictions, or robots.txt blocks. If the file sits outside the site’s root URL, confirm that the submitted keyLocation points to it and covers the submitted URLs.[13][14]
Next, test a published page, a content update, a removal, and a permanent redirect. Submit changes only after they’re live, using public canonical URLs. Leave out preview, staging, tracking, and duplicate URLs. For removals, check the intended 404 or 410 response and deletion handling. For redirects, check the old URL’s permanent redirect and submit the final destination. Record the URL, change type, submission time, and submission response. Then use logs and webmaster tools to record later crawl or indexing activity.[13][17]
Once submissions are live, track citations, referrals, and conversions for the updated pages.
Step 7: Track AI Citations, Referrals, and Conversions
Use the same priority pages from earlier steps as your monthly test set. Before making changes, test 10–20 fixed prompts. Rerun them monthly on the AI search systems your audience uses. Record the prompt, system, date and time, locale, device, login status, cited URL, and result quality, including citation prominence and factual errors. Separate unlinked brand mentions from linked citations, and save the answer wording with screenshots or exports.[1][4]
| Metric | How to collect it | What it cannot prove |
|---|---|---|
| AI citations | Rerun fixed prompts; save answers, cited URLs, and citation prominence | One answer does not represent every user’s results |
| AI referral sessions | Filter GA4 Traffic acquisition by known assistant sources; record landing pages and sessions with engagement | Missing referrers leave some visits unattributed |
| Conversions | Connect forms, calls, bookings, and purchases to analytics events and CRM records | Device switching and later visits can break attribution |
| Organic performance | Track clicks, impressions, indexed pages, and conversions in webmaster tools and analytics | Changes may reflect seasonality or search-engine updates |
| Crawler activity | Check server or CDN logs for URLs, timestamps, status codes, and verified bot identities | User agents can be spoofed; crawling does not prove citation |
Keep identified AI referrals, unattributed traffic, and assisted conversions separate. Do not label all Direct traffic as AI traffic.[18][19]
Your WordPress AI Search Checklist
Start with your highest-value pages, then work through the rest of your site. Fix blocked or inaccurate priority pages first.
- [ ] Audit access: Confirm priority pages return HTTP 200, are indexable, have a valid canonical URL, and aren’t blocked.
- [ ] Add answer-first introductions: Use the first two sentences to explain what you offer, who you serve, where you operate, and what readers should do next.
- [ ] Make headings specific: Write H2 and H3 headings that address the page’s main questions.
- [ ] Validate JSON-LD: Keep schema aligned with visible facts. Check it with Google’s Rich Results Test and Schema Markup Validator.
- [ ] Publish useful FAQs and check customer answers: Use real customer questions. Have qualified staff approve prices, policies, hours, and service areas.
- [ ] Test IndexNow: Check key validation and URL submission for additions, updates, and removals where supported.
- [ ] Track results: Log cited URLs, brand mentions, referrals, and conversions separately.
Assign an owner to each priority URL. Review those URLs and their access monthly, and check citations and referrals quarterly. Revalidate schema after template or plugin changes, and update business facts whenever they change.
FAQs
How soon could my WordPress site appear in AI answers?
Timing varies by platform and depends on when crawlers next visit your pages. Submitting your updated sitemap in Google Search Console and Bing Webmaster Tools can help them find changes sooner.
Can I optimize for AI search without coding?
Yes, you can optimize your WordPress site for AI search without writing code. WordPress SEO plugins let you add business details, services, and FAQ content through settings panels. They then automatically add structured data (JSON-LD) to your site.
For more advanced AI-specific work, LovedByAI can handle schema nesting, entity grounding, and machine-readable summaries in the background. You don’t need to write code or change your theme.
Why isn't AI citing my site despite valid schema?
Valid schema alone may not get your site cited by AI. Your data may be incomplete, conflict with other details, or fail to match your visible content. Generic Organization schema may also describe your entity less clearly than LocalBusiness or Service schema.
Check that your pricing, addresses, and service areas match across your schema and visible content. Multiple plugins can add duplicate or conflicting schema, which may cause crawlers to ignore the data. Also, make sure your robots.txt file doesn’t block AI crawlers.